Showing posts with label Thrifty Tips. Show all posts

March 29, 2013

Creating Calendar Cards

Almost every morning as we sit down to breakfast we discuss what day it is and what we have planned for that day.  We sing our songs and change our calendar accordingly (see my other post to read in further detail).  One thing Addi really likes to do is swap out all the numbers on the calendar at the end of the month.  One of the ways I try to teach her the difference between the months is by using different sets of numbers for the days.  One month we may use a set of numbers with a fun-looking font and the next month we may pick a set that corresponds with a particular holiday that will take place that month.  
I had a friend who visited about once a month and she eventually asked me,  "How many sets of calendar days do you have?"  I didn't really know how to answer her, because well...we have a lot; not because they are cheap (because if you buy them in the store they're not), but because they are easy and fun to make.  There are endless possibilities and you can get as creative as you want with them.  The process is simple and but there are two ways to begin.  


The first option, which is the easiest (if you can find the right product at the right price), is to find calendar cards.  Last fall, right before school started, I scoped out the Dollar Tree near my house.  Somewhere hidden within the piles of teacher supplies I found a pack that had not one, but TWO sets of calendar cards for $1.  They had several different packs too so I think I bought three different packs (each with two sets).  They are cute too.  Both of the above sets were included in one of these packs.  The problem with these sets is that they are cardboard and easily tear if not handled with care.  

The second option is to make your own set of numbers.  This is where you can get as creative as you want.  You can cut out a shape and write the numbers on the shape.   The set below is a set that I made for February.  They are simple hearts that I cut out and used number stencils on.  Easy peasy.
Another option when making your own is to pick out a pack of post-it notes that you can "dress up."  Each of these post-it note sets I got on clearance for $0.30 a pack.  There are so many varieties you could do just about anything.  If you wanted you could even use scrapbook paper that you really like.  Seriously, anything will work.  All you need to add are the numbers.  You can free hand it.  You can use stickers.  You can use stencils. Whatever you think looks best.

After getting them just the way you want them, pull out your laminator!  Let me reirriate  from a previous post that small at home laminators are not as expensive as you might think.  I was given one for my birthday last year.  The actual laminator was only $25.  It works great, is easy to use, and I use it quite frequently.  The laminator sheets can be bought cheap too if you shop around.

Anyway, back to the calendar cards, I can usually get between 6-9 numbers per laminator sheet meaning that at most I use 5-6 laminating sheets. This means that at most I would be spending about $1.50 on lamination.

Next, I buy a pack of velcro (not the kind that has adhesive on the back, but the kind that would be used if you were sewing it onto a product).  I bought two packs for $1 at Walmart.

All you have to do is cut the velcro into squares, pull out your hot glue gun, and place the squares exactly where you want them. 
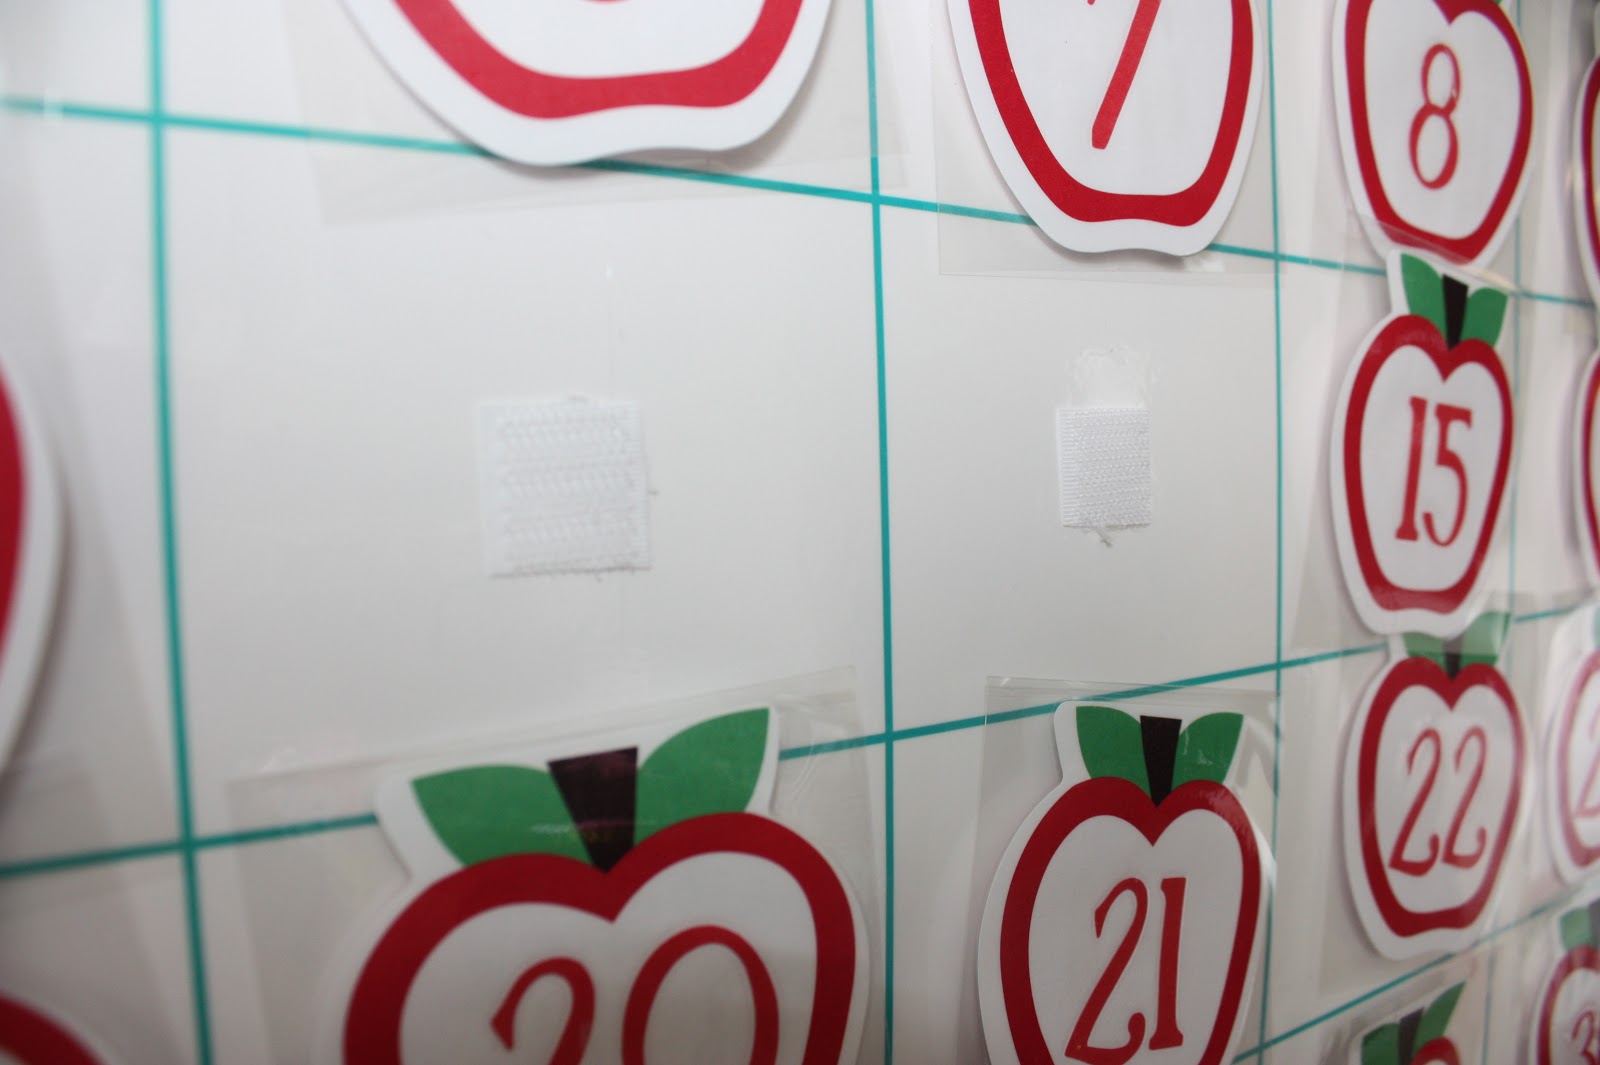


I used the coarse side of the velcro for my calendar board so anytime I make any new number cards I have to make sure to sure the soft side of the velcro.   This is very important if you actually want your numbers to stick to the board.


One thing to remember is that if you pull the numbers off quickly the hot glue will not hold the velcro on as well as you might like.  Be gentle with it and, if it does pull apart you can fix it simply by pulling out your hot glue gun again.

All in all, you can make a set of numbers for as little as $3.  This is a great deal when you see that some sets at a teacher supple store run as steep as $15.

In addition, I wanted to show you some of the extras I got in my Dollar Tree packs.  All these special cards were included and I thought that was so cool.


Finally, I wanted to remind you that if you didn't want to write the numbers on the cards before you laminated them, you would use Expo markers to write on them afterwards.  Sometimes when we play counting games I'll use a set I have left blank and I'll write numbers on them as we go.

I hope you've been inspired to get creative and I would love to hear about some of your successes!


February 20, 2013

The Secret to Being "Book Smart"

A friend and I were talking the other day about different types of workbooks you can buy to give your child practice with different skills. They have workbooks on just about any topic ranging from colors, shapes, letters, math skills, or whatever else you can possibly imagine.  They have them for preschoolers.  They have them for high schoolers.  There are hundreds of styles and formats by numerous different publishers.   Some are pretty expensive costing as much as $15-20 and others you can find at the Dollar Store.  My friend was telling me how she would like to expose her son to educational activities and not just coloring books; however, she really has a hard time investing in them.  She hates buying workbooks because her son doesn't know how to read and therefore it's difficult for him to understand the directions or expectations of the activity unless she is sitting right beside him.  She spoke about how they seem to go through these books in hardly no time because he will "complete" five or six pages (or more) in one sitting.  She also said that once he has finished a page (whether it's done correctly or not) it ends up in the trash and she feels like they are wasting so much paper because of how quickly they go through these books.  No matter how you look at it, buying these workbooks can get really expensive, especially if your child enjoys completing multiple pages a day.

It was then that I realized that not everyone knew the secret I had been told a few years ago.  At the time I was told, I didn't know it was a secret.  In fact, I felt so silly because I thought I was the only one who hadn't heard of it before.  Imagine my relief when I shared these tips with my frustrated friend.


The secret?  Are you ready?  Well, here it is...you get your kid to REUSE the same pages over and over again.  Simple enough, right? But then, how do you do that when there is marker, crayons, and color pencil all over the page?  Well friends, it's all about prepping the pages BEFORE your kid uses it the first time.  Here are several tips that have helped me and hopefully they can help you too:

Round up your resources!  

Find any and every activity book you have and make one large pile.  My grandmother found a few preschool workbooks on sale at Costco and they have tons of great activities in them.  In addition, I have found partially used books at yard sales for a quarter (or less).  Sometimes people are so desperate to get rid of these types of book they will just give them to you.  I have friends who have older kids and they are always trying to clean out the "junk"they don't need anymore.  I was given four like-new workbooks absolutely free.


Tear up your books!  

That's right.  You heard me.  Forget what your momma told you and for a brief moment, be a rebel!  Any page in any of the books that you think might possibly be usable, tear it out!  As you are doing this, begin to look for themes and create piles.  Some of the piles I created when I sorted through our books included shapes, colors, Dot-to-Dot letter activities, Dot-to-Dot number activities, mazes, and more.  I sorted every letter of the alphabet into separate piles so that when we did our Letter of the Week series I had several handwriting and practice sheets for that particular week.

As you can see in the picture below, you can end up with a ton of the same type of activity from many different books.  Then, as your child goes through a stage where he or she really enjoys that particular type of activity you have an overabundance of resources to choose from.


Protect and preserve!  

Depending on the type of activity, you need to decide on what will be the most efficient and cost effective way to preserve that particular resource.  For example, my preference is to either laminate or use sheet protectors depending on the activity.  Lamination and sheet protectors both protect the original document and allow your child to complete the activity over and over again as many times as they would like by simply using a dry erase marker or a crayon!  And, it's just as easy to clean up.  I use a wet paper towel to wipe and then follow with a dry paper towel.  Here are the pros and cons to each method I use as well as a few examples.
  • Lamination- Lamination is a beter option if you are looking to make something sturdy, if you plan to use the item more than 2-3 times, or if your goal is semi-permant durability.  Lamination can be cumbersome and costly.  An inexpensive lamination machine can be found for $25 and the lamination pouches cost anywhere from $10 and up depending on the quantity you want and the thickness of paper.  I choose to laminate worksheets that I know I will use on a fairly frequent basis, such as beginners handwriting activities.  I also choose to laminate activities that are oddly shaped, because I can cut around the edges to make the activity look much nicer.


  • Sheet Protectors (pocket protectors)- These are essentially a sleeve of plastic that remains open at one end, which allows you to slide any paper in and out.  They are reusable and will keep your papers pristine.  They are much more cost effective since you can purchase a pack of 25 for as little as $3.  One minor drawback to sheet protectors is that sometimes the paper slides back and forth and what was written on the outside will not actually match up with the worksheet.  Again, this is minor and if you are using it for a very short time, it will not really matter.


Think outside the box!  

Finally, look for things that are free or that you can get extremely cheap and use them in new or different ways.  I have gotten many partially used word search or sudoku books that I use for letter or number lessons.  One of Addi's favorite activities is to use a Do-A-Dot marker and find her Letter of the Week in a word search puzzle.  She doesn't have to find the words that are actually hidden in the puzzle, all she knows to do at her age is to look for her special letter of the week.  For her, it's great fun.  And, for me...it's free fun!


Now, the last thing to consider when planning with all of this is the time it takes.  Time is money right?  So, you need to think through if taking apart your books, organizing, and laminating is worth it in comparison to the amount of money you would be spending on new workbooks.  Everyone is different and the only right answer is to identify what works best for you.  I've only just shared my opinion.

Do-a-Dot

When I first started looking into preschool activities, I was seeing Do-A-Dot activities everywhere.  I went to pick up a Do-A-Dot marker for Addi and suffering from a case of sticker shock, I ended up not getting one.  After looking at four different stores the cheapest one I found was $3 and the cheapest set (a 6 pack) was $15.  I started wondering what it was that made them so great.  Then, low and behold, one day as I was walking through the Dollar Tree I saw "Bingo Markers."  They come in all the same colors, are actually are smaller in circumference (so they fit in a preschooler's hand better) and they are only $1 each!  I only purchased one at the time because I wanted to see if the quality was equivalent to the price or if I had really truly just found a great deal.  Fortunately, the later was true.  I went back around Christmas time and purchased 3 other colors that we put in Addilyn's stocking.  I'm so excited about my find and I hope you can benefit from it too!


Busy Bag Organization

Several ladies have asked me how I organize and store our busy bags.  Great question!  When we first started making them last year and after one or two busy bag swaps I realized how quickly they became a cluttered pile of confusion.  I asked another lady who I had swapped with and she said she just kept them in a box in their coat closet so they were easily assessable to the kids but out of the way.  Great idea I thought, until I realized, oh yeah...we don't have a coat closet (or any kid-friendly closet).  I considered Addi and Josiah's closets, but then I realized how much I didn't want them to pull out the busy bags unsupervised because some of them do have smaller pieces.

Next I researched what other blogging busy bag moms have done to keep them organized. Testy yet Trying used 3 ring binder pencil pouches with a clear plastic front.  Because they are all the same shape and size she is able to store them neatly in cardboard boxes.  I found myself wishing I could afford a bajillion pretty 3 ring binder pencil holders, and then soon realized that I would be spending more more on the busy bag holders than the actual activity itself.  Ha, never mind!  I think my ziplock bags will work just fine (even if they don't stand up neatly in a box).  I also thought about that the old phrase "out of site, out of mind." If I were to place all the busy bags in neat boxes and store them somewhere I would probably be less likely to pull them out as often.  I imagined myself telling Addi she couldn't play with her games because I didn't want to fool with the hassle of pulling out a box.  Or even worse, I imagined that Addilyn and I both would forget she even had the games to play with.

Finally I decided I was going to set them out in some orderly way in our laundry room (closest thing I have to a closet in the front of our house).  I tried multiple ways before I finally found a method that worked for us.  My favorite failed attempt was to replicate the method used by  We Love Being Moms. They used shower curtain rings and clips to display all their busy bags from a wire shelf in a closet.  Well I wan't about to purchase and install a wire shelf in my laundry room (because I already have great cabinets and there would not have been any room); however, I thought I might be able to improvise.  I Found a tension rod that we had used in our previous home and I tried securing it in multiple locations (under one of the cabinets, in-between two shelves, and another that wouldn't make any sense even if I tried to describe it to you).  However, by the time I added the shower curtain rings and one or two of the busy bags the rod would slip loose and fall.  I tried this over and over again tightening the tension rod each time.  With each failed attempt I became more and more angry.  I soon realized I was a living example of the quote, "Insanity is doing the same thing over and over again but expecting different results." I finally came to my senses and decided to start back at square one.

As, I was putting back the tension rod in this small nook with the other odds and ends we used at our old house I came across a over-the-door hanging shelf.  We had used it on our pantry door to create more "shelving" and here it was just waiting to be put to use once again.  The notches in it were the perfect size for a clothespin so I decided to give it a try.  Perfect!

Each bag is hung up by a single clothespin and I have enough spaces to hang approximately 30 bags.  In addition the heavier bags can sit on the actual shelves directly behind the clothes pins.

This has worked so well for us.  First, it is neatly put "away" in the laundry room so that when we have guests they are not seeing tons of bags laying in a basket or a box on the floor.  Secondly, it is still placed in a area that I see every day so that we don't forget we have them.  Third, they are organized so the kids can see many options of games, but they are high enough on the door so they can't get them down without my help.  Finally, they are extremely easy to get out and put away (it really is as simple as squeezing a clothes pin).

And, for all the ones that don't fit, I pack them away for a  month or two and then trade them out with the ones the kids have been playing with.  It's the "put some of the toys in the attic" trick; except in this case, I use clear plastic storage bins next to my dryer.  I have one bin for seasonal busy bags (i.e. Christmas, Valentines, etc.) and another one for year-round games I can pull out for just any old reason.  I've found that the ones that have been put away for a little while are also good for road trips or doctors visits!


Building Letters

Last fall when we were visiting a friend in GA their preschooler had this really neat Letter Construction Activity they had found on Amazon for $30-35.  It was so cool.  The goal was to place pieces of colored plastic on top of a template of a letter and actually built the shape of that particular letter.  A few weeks later I saw a post on Pinterest about how to make your own version of this activity.  I've gone back and looked through my boards and for the life of me I cannot find that pin.  So, please know that this was not my idea and to whoever came up with this do it yourself "Build a Letter" activity, THANK YOU!

For the lowercase letters I used some orange foam and even made the template cards to place the foam on. However, for the uppercase letters, I ran out of ink and scrapbook paper so I decided that my kids could just do it without the template and figure out how to fashion the letter from the blue foam alone.  Both ways have worked just fine.  It took about 1 1/2 hours to pint the letters, cut the letter, paste the letters on the scrapbook paper and then cut the foam strips.  All in all 1 1/2 of work saved me approximately $30.


Sandpaper Alphabet Set

As I've been teaching Addilyn her letters, I think it is more important for her to learn the sounds each letter makes rather than the name of each letter.  When we visited a montessori school I saw their sand paper alphabet set.  They had wooden blocks with each letter of the alphabet on it.  As the student traced the correct way to draw the letter he or she would also practice saying the sound the letter made.  I thought this was wonderful.  I looked for the tactile letters set online and they ranged from $15-$42.  We didn't have the money to go buy these sandpaper wooden blocks so I decided to make them for my self.  With a little red card stock I had laying around and a pack of sandpaper I bought at the Dollar Store, we now have our own set to practice with and it cost me a total of $1.08!


Related Posts Plugin for WordPress, Blogger...
Twitter Delicious Facebook Digg Stumbleupon Favorites More

 
Design by Free WordPress Themes | Bloggerized by Lasantha - Premium Blogger Themes | ewa network review